-
+86 13720060320
-
lanna@haitangs.com

Washdown Equipment Hinges: Avoiding Water and Residue Traps
A narrow wet line can remain beneath a hinge after the surrounding door has drained. Opening the door may release another drop. At the next inspection, a deposit appears along the same edge. Before wiping the evidence away, photograph the joint in the position where the problem occurs.
For washdown equipment hinges, the useful starting point is the installed assembly: where liquid arrives, which surfaces retain it, and what changes when the door moves. This article follows that investigation on food-processing access doors, covers, and service panels, from the first visible trace to a structural correction that can be checked on the equipment.
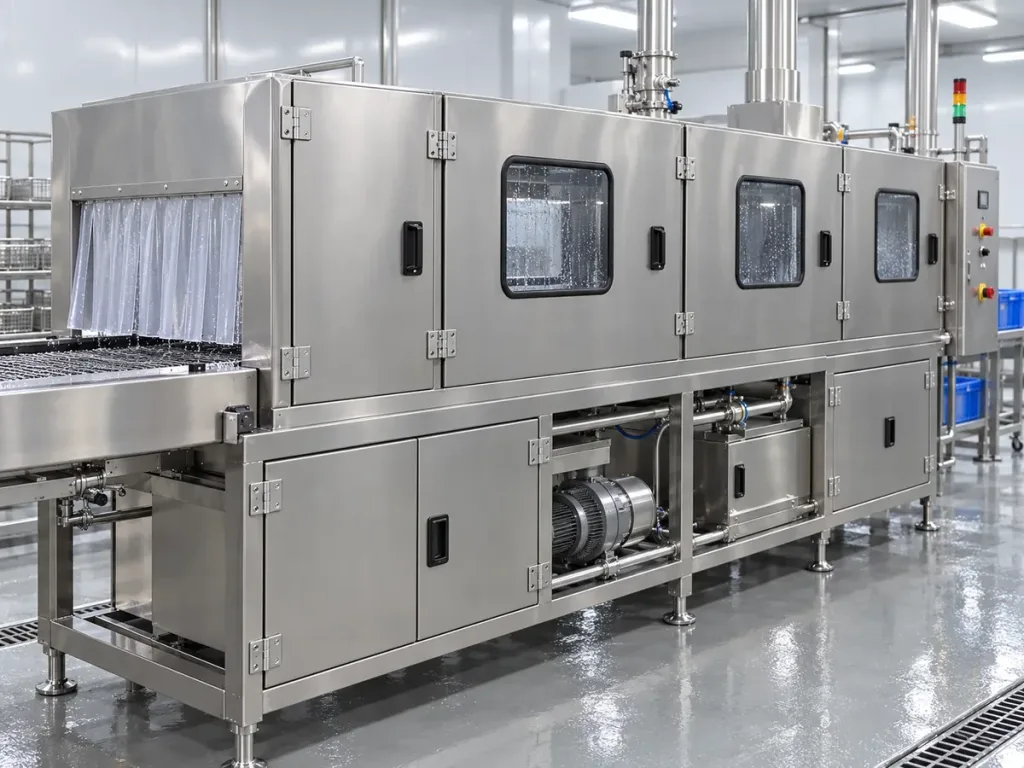
Where Washdown Equipment Hinges Hold Water
Inspect the hinge in its normal installed orientation. A loose sample placed flat on a bench cannot show the runoff from the machine above it or the pocket formed between the hinge and the door frame.
| Observed pattern | Possible source | Next useful observation |
|---|---|---|
| A drop repeatedly forms at the same lower edge | Runoff arriving from above or liquid escaping a hidden interface | Trace the wet path upward before disturbing the hinge |
| Liquid appears only when the door opens | An overlap, pin joint, or return that changes orientation with movement | Observe the first point of release during permitted door movement |
| A narrow deposit follows a leaf or washer edge | Retained soil, cleaning residue, mineral deposits, or corrosion at the interface | Expose the relevant surface during an approved inspection and identify the deposit |
| A pocket stays wet after adjacent surfaces drain | A local low point with a restricted exit | Inspect the outlet and the surrounding flange in the actual mounting position |
These are diagnostic leads, not proof of a particular failure. For example, the lowest hinge may receive water from the upper door return even when its own exposed surfaces drain freely.
Trace the Runoff Before Opening the Joint
Look above and beside the hinge first. Follow the door edge, frame return, upper cover, reinforcement, and any fitting that can shed water toward the joint. A drop on the hinge may be the end of a longer route.
On a representative assembly, observe the approved cleaning routine from a safe position. After equipment isolation and any required door support, inspect the hinge area without first wiping it dry. Use side lighting or a mirror where practical. Photograph the source-side surface and the collection point in the same sequence.
Separate two conditions: fresh liquid still arriving from another surface, and liquid already retained locally. If upstream runoff continues, changing the hinge alone may leave the symptom unchanged. Once that runoff stops, a remaining bead at a leaf edge becomes a more useful reason to inspect the interface behind it.
Changing the route of incoming water also requires checking its destination. A small deflector might reduce wetting at the hinge while sending the same flow toward a door seal, an electrical opening, or a less accessible frame cavity. Its underside and attachment points must remain suitable for cleaning.
Use the cleaning positions that the equipment actually allows. An electrical enclosure intended to remain closed during washdown should stay closed during that part of the investigation. Inspect its interior afterward under the approved access procedure; opening it to improve spray access would create a different condition.
The Hidden Interface Behind the Leaf
The mounting leaf can cover a broad area that the rinse never reaches directly. Local contact between the leaf and the mounting pad may leave connected narrow gaps elsewhere. Liquid can enter those gaps and remain after the surrounding face drains.
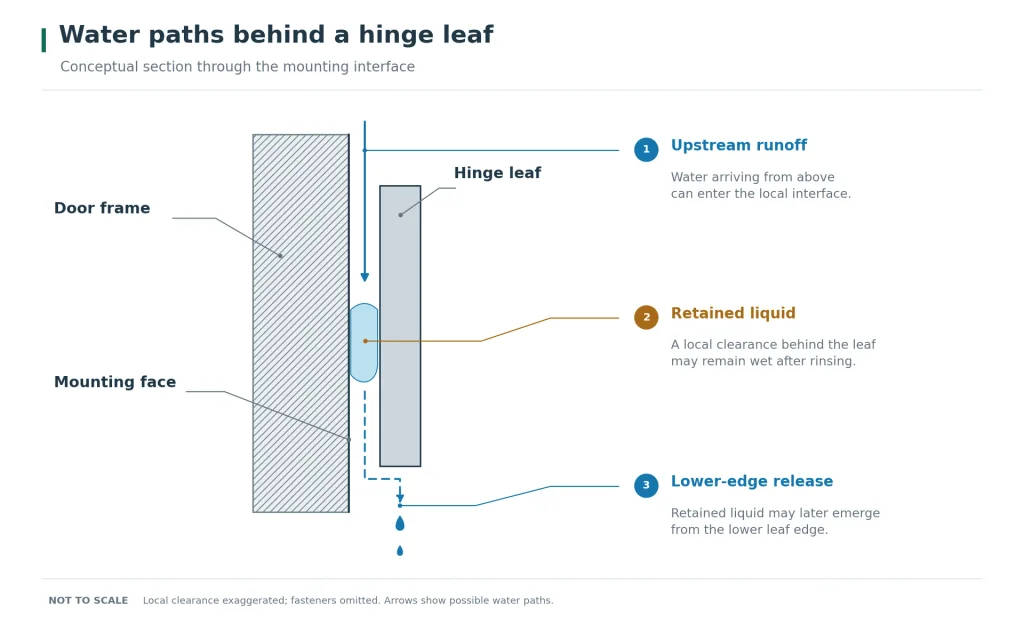
During planned disassembly, support the door before releasing hinge fasteners. Inspect the back of the leaf, the mounting pad, and the hardware before cleaning away the evidence. A perimeter outline, an isolated wet patch, or a deposit around one hole helps locate the affected part of the interface.
Do not assume that a tighter joint is a sealed joint. Tightening can increase contact in one area while the leaf bridges a high spot elsewhere. If seating changes as the screws are tightened, the next investigation belongs to hinge mounting surface flatness and leaf seating, rather than additional tightening by trial and error.
Fasteners can interrupt the cleaning path
Look at the complete fastener detail: the head recess, washer edge, exposed thread, and the transition into the leaf. A rounded head may improve the exposed contour while leaving a wet interface underneath. Replacing only the visible head does not establish how the rest of the connection will be cleaned or sealed.
Keep three different findings separate:
- Accessible deposit: the cleaning method reaches the surface, but material remains.
- Shielded deposit: the leaf, head, or washer prevents the intended cleaning action from reaching it.
- Interface leakage: liquid emerges from a connection intended to keep that area dry.
The first finding calls for a cleaning-process review as well as inspection of the surface. The second points toward access or geometry. The third requires the intended sealing detail to be checked. Increasing wash pressure is not a substitute for distinguishing them.
A welded attachment still needs an inspectable edge
Check where the leaf meets the parent metal, including the ends of the weld and the spaces between any intermittent welds. Those spaces can open into a larger overlap behind the leaf. A smooth exposed bead does not describe the condition of that concealed interface.
Any change to weld continuity, profile, or finishing should be reviewed with the fabrication process and hinge alignment. Grinding a joint until it looks smooth can remove needed material. Adding weld can distort the mounting plane or move the pin axis. The cleaning problem and the structural connection have to be resolved together.
Door Movement Can Expose a Different Trap
The clearance between a moving leaf, the knuckle, and the frame changes as the door opens. A surface visible at a wide angle may be covered at the cleaning position. A return that drains while the door is open may become a shelf when it closes.
On the isolated, supported assembly, follow the wet area through the permitted movement. Watch the hinge-side return and the point where each knuckle or bracket passes the frame. Observe where liquid first appears, rather than assuming it came from the nearest visible pin end.
Keep fingers, cloths, and inspection tools out of the closing joint. Stop the door in an approved stable position before examining a narrow gap. Door movement is useful evidence only when the observation can be made without creating a pinch or handling hazard.
For a pin joint, establish which spaces are intended to be exposed and cleanable and which are protected internal spaces. A decorative end cap is not necessarily a seal. A visible bore is not necessarily an approved flushing passage. Use the model’s construction and maintenance information before directing cleaning liquid into either.
A change in opening angle can improve access to the frame-side surface, but that angle must be available on the installed machine. Nearby pipework, guarding, a cable, or an adjoining machine may stop the door before the cleaning position shown on the drawing.
A smooth exterior can hide a wet pocket
Consider a stainless service door whose external hinge is replaced by an internal bracket to make the outer face easier to wipe. During the approved closed-door wash, runoff reaches an unsealed overlap near the upper return. A small amount enters the bracket pocket and collects behind a lower lip.
The exterior looks better. The concealed pocket still holds water. When the door is opened for inspection, the pocket tilts and releases a drop onto the frame.
The useful correction depends on the actual entry route: revise the protective interface, redesign the pocket, or provide suitable cleaning and inspection access. Changing only the visible hinge finish would leave that route unchanged.
This is an illustrative engineering scenario, not a customer project record or product test claim.
Drainage Changes Must Preserve the Hinge Support
Once the entry route and trap are identified, consider the smallest structural change that addresses them. The solution may sit in the door return or mounting pad rather than in the hinge itself.
For an exposed wet-side interface, an engineering review may favor an accessible arrangement that can be cleaned and drained or a designed barrier that excludes the unwanted liquid. The intended function of the interface determines which approach is appropriate.
Match the correction to the physical cause:
- Restricted access: reposition or reshape the obstruction so the approved cleaning action can reach the affected surface.
- A local collection shelf: revise its orientation or geometry and show where the runoff will discharge.
- An unintended wet interface: review the mating surfaces and sealing arrangement, including assembly control and later inspection.
A spacer illustrates the tradeoff. It may expose more of the leaf’s back face, yet add another interface and move the door load farther from its support. Longer fasteners, mounting-pad stiffness, pin alignment, and the gasket path may all need review. There is no universal spacer thickness that makes a hinge installation cleanable.
Similarly, relocating a hinge can change the door sweep and how the seal approaches the frame. Check the full movement and closed condition on the revised assembly, including the hinge-side gasket. A latch should not be used to pull a displaced door back into its intended alignment.
If routine panel removal exposes the actual trap, the guide to lift-off hinges for removable access panels covers removal and retention choices. Remember what detachment actually exposes: lifting the door off a pin may open the knuckle area while leaving the back of the frame-mounted leaf covered.
With the correction defined, use the revised door section to compare food-processing and washdown equipment hinge options against the required mounting geometry, cleaning access, and door movement.
What the Deposit Can Tell You
A deposit at a hinge edge is not automatically food residue. Possible sources include process soil, cleaning-product residue, mineral deposits, corrosion products, and wear debris. Its location helps identify the path; appearance alone may not identify its composition.
Document where it occurs and when it returns, then involve the responsible sanitation, quality, or maintenance team in identifying it. If residue reappears only after door movement, inspect the surfaces that movement exposes. If the affected area includes pitting, flaking, or a damaged seal, cleanability and component condition both need attention.
Once a material problem is supported by evidence, identify the exposed components individually. The leaf, pin, fasteners, bushing, and any sealing material may have different compatibility limits. Use the actual cleaning chemistry, concentration, temperature, contact time, and rinse conditions in the review.
The 304 versus 316 stainless steel hinge guide addresses grade selection. A material change can be relevant to corrosion, but a pocket formed by overlapping parts will remain a pocket unless its geometry also changes.
Recheck Under the Actual Cleaning Routine
Use a representative installed door or cover with the intended mounting hardware, finish, gasket, and surrounding returns. Include adjacent equipment that limits cleaning access or directs runoff toward the hinge.
Plan the next approved trial around the same observation locations and door positions. Keep cleaning conditions consistent and record changes that could affect the comparison.
The record should make it possible to distinguish a better joint from a longer rinse or a different drain period.
| Record item | What to capture | Why it belongs in the comparison |
|---|---|---|
| Installed detail | Hinge identity, joint revision, mounting orientation, and surrounding section | Connects the observation to the actual assembly |
| Cleaning condition | Approved procedure, relevant process soil, chemistry, temperature, and application method | Shows whether the compared exposures were equivalent |
| Door state | Closed, approved cleaning position, or approved inspection/removal position | Identifies which overlaps were exposed |
| Observation timing | Time from the end of rinsing and any intervening door movement | Distinguishes immediate runoff from delayed release |
| Location and evidence | Marked inspection point, photograph, and any prescribed residue-check result | Allows the same surface to be compared |
| Mechanical recovery | Leaf seating, pin engagement, door travel, gasket condition, and latch alignment | Checks that the correction preserved the door’s function |
Start with the undisturbed assembly, inspect the permitted opening positions, and expose hidden areas only under the agreed maintenance procedure. Reassemble any disturbed parts before checking the closed door again. Take care not to treat water introduced during inspection as evidence of water retained during washdown.
Agree on the observation time, accessible inspection locations, residue criteria, and required cleaning validation with the equipment owner and responsible hygiene team. This article does not supply universal limits for gap size, drainage time, allowable residue, or cleaning-cycle count.
A visible improvement supports a geometry finding. Visual dryness alone does not demonstrate removal of microorganisms, allergens, or chemical residues. Any sampling or validation required by the plant remains part of its established sanitation controls.
EHEDG Guideline 8, Hygienic Design Principles, provides the broader design framework for food-manufacturing equipment. It does not certify the hinge described in an article or replace assessment of the installed equipment. The responsible team still needs application-specific cleaning conditions and acceptance evidence.
Washdown Hinge Questions
Can higher wash pressure clean behind a hinge leaf?
Higher pressure cannot be assumed to make a shielded interface cleanable. It may change where liquid enters without creating access for residue removal or inspection. Keep the investigation within the equipment’s approved cleaning conditions and assess the concealed geometry before changing the cleaning process.
Does an enclosure’s water-ingress rating prove hinge cleanability?
No. Evidence about liquid entering an enclosure answers a different question from whether its exposed hinge interfaces retain soil or cleaning liquid. Review the scope of the rating and assess the installed hinge area separately. A rating for a complete enclosure also does not automatically transfer to a replacement hinge or a modified door.
Can I drill a drain hole in an existing hinge?
Do not modify a load-bearing hinge or enclosure boundary without the manufacturer’s and equipment designer’s review. A hole can affect the section, coating, sealing, or pin retention, and may create another inaccessible edge. Establish where the liquid will go and whether the complete revised assembly remains suitable.
Can silicone sealant close a gap behind the hinge?
A sealant repair needs a defined, compatible joint detail. Surface preparation, movement, cleaner exposure, edge shape, and inspection access all affect the result. Applying a bead over an unexplained wet interface may conceal retained material or leave an incomplete barrier. Have the interface assessed before treating sealant as the correction.
Why does moisture return when cold equipment is idle?
Consider condensation as another possible source when new moisture develops without additional rinsing, particularly on cold metal. Record the equipment temperature and ambient conditions and compare the hinge with nearby surfaces. That helps distinguish ongoing moisture formation from liquid stored in a pocket; both can occur together.
What if the hinge looks clean but a residue check fails?
Retain the failed location and method in the investigation. Check whether the tested surface, including any hidden return or overlap, received the intended cleaning action. The plant’s sanitation or quality team should interpret the result and direct further checks. Surface appearance is insufficient grounds to release a previously failed area.
If washdown equipment hinges are leaving a repeatable wet or residue trace, share hinge-area photos and a door section with HSP. Include the closed and permitted open positions, the suspected collection point, and the cleaning conditions. Those details support a discussion of mounting geometry and available hinge options; cleaning acceptance remains with the equipment’s validation process.