-
+86 13720060320
-
lanna@haitangs.com

How to Select Laboratory Cabinet Hinges for Cleaning and Service Access
A laboratory cabinet hinge can be corrosion-resistant and still create a poor cleaning and service detail.
The joint may leave a narrow unwiped strip behind the leaf, retain liquid around a screw head, trap the service panel below an overhead shelf, or allow the door to reinstall slightly low so the gasket and latch no longer meet the same way.
That is why laboratory cabinet hinges should be selected from four connected questions: what surfaces must remain accessible, whether the panel must come off, how it will be controlled during removal, and how the closed alignment will be restored after service.
This page is limited to cabinet doors and removable service panels. A lid or display that must hold at intermediate angles belongs in a separate torque or position-control review.
Start at the Cleaning Boundary
The word “laboratory” does not define one cleaning condition. Some cabinets receive only dry wiping. Others sit near repeated disinfectant use, condensation, reagent splash, or scheduled decontamination. The hinge decision should begin with the actual boundary around the joint.
Mark which surfaces are exposed, which surfaces are merely adjacent, and which internal areas are never intended to be wetted. Then identify the cleaner or process chemical, application method, contact time, frequency, rinse or drying condition, and the components the liquid can reach.
The critical point is not the nominal leaf material. It is the complete joint: leaf, pin, fasteners, bushings, welds, coatings, retained lubricant, and the cabinet geometry around them.
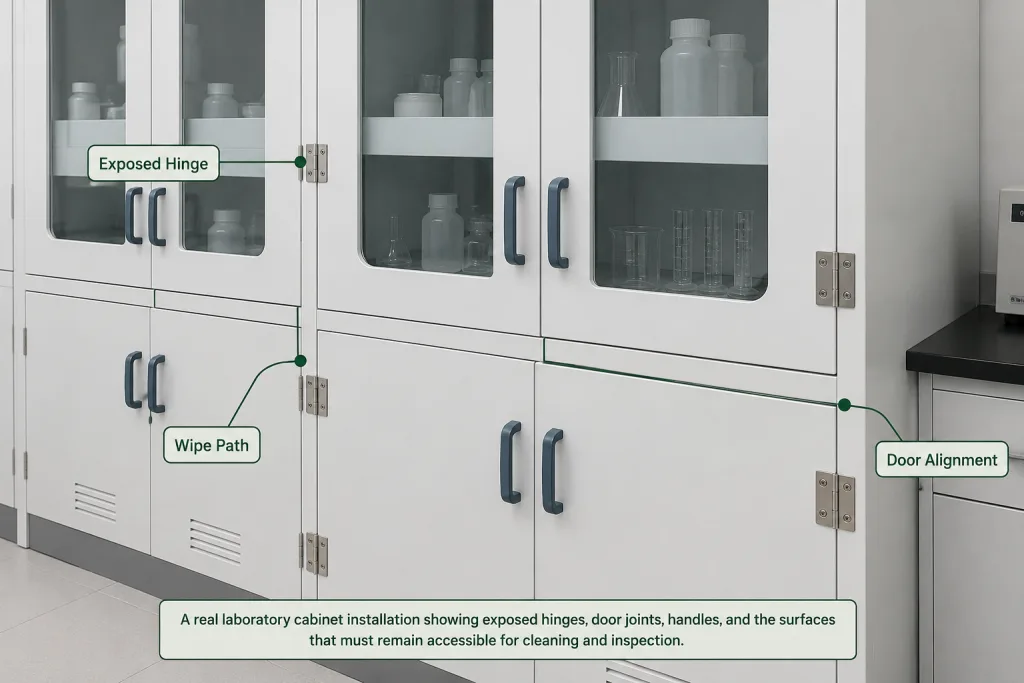
A real laboratory cabinet installation showing exposed hinges, door joints, handles, and the surfaces that must remain accessible for cleaning and inspection.
Drawing release rule: define the cleaning boundary and visible joint before choosing a material or hinge style. “Stainless steel” is not a substitute for an accessible, drainable, inspectable joint.
Exposed or Concealed Joint?
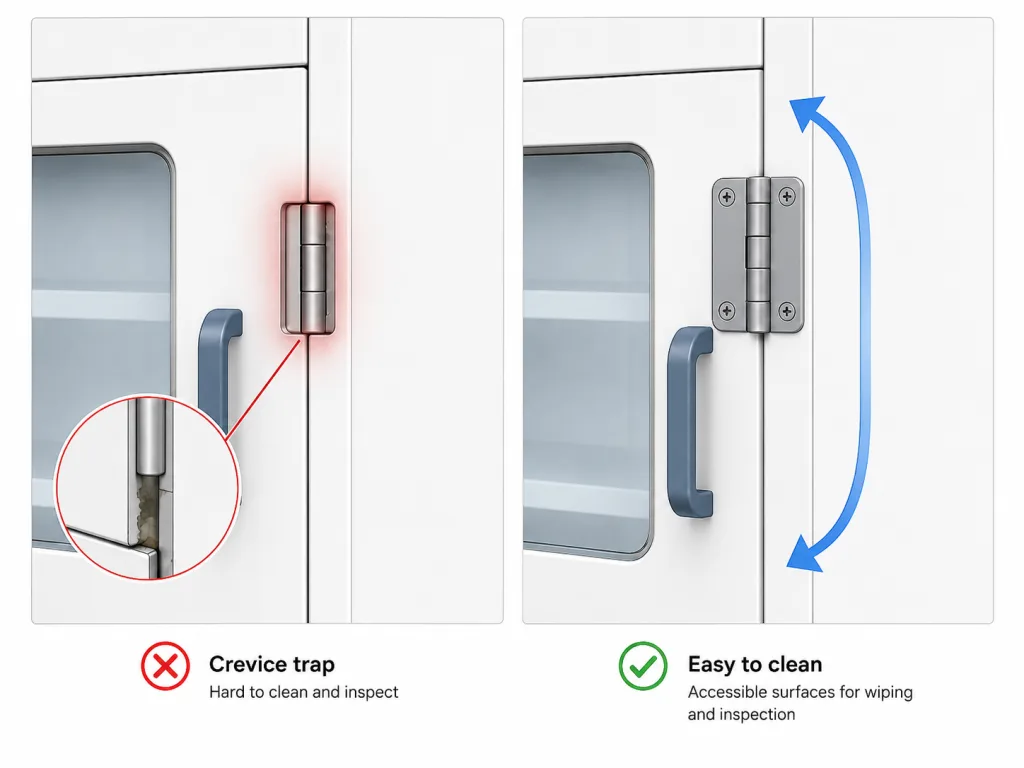
An exposed hinge is easy to see. That does not automatically make it easy to clean. A concealed hinge leaves the outer skin uninterrupted. That does not automatically make the hidden cavity acceptable.
Compare the two architectures by the actual wipe path, inspection access, fastener exposure, drainage, and the space available behind the door return.
| Joint Question | Exposed Hinge | Concealed Hinge | Required Decision |
|---|---|---|---|
| Can the whole joint be seen? | Usually yes, including leaves and fasteners | Outer surface may be clean; internal cavity may be hidden | Define which side must be visually inspectable |
| Can the hinge-side return be wiped? | Depends on leaf width, knuckle position, and opening angle | Depends on internal pocket and door travel | Show the door fully open in section |
| Where can liquid remain? | Around screw heads, weld toes, knuckle gaps, or overlapping leaves | Inside a pocket, behind a bracket, or along an internal return | Identify the lowest retained-liquid point |
| Can the fastener or weld be inspected? | Often accessible when the door is open | May require panel or trim removal | Define service access, not only installation access |
| Does removal improve cleaning? | Possible with lift-off or removable-pin architecture | Possible only if the concealed geometry allows extraction | Show the complete removal path |
A surface-mounted stainless hinge may be the more transparent choice when the joint is visible, accessible, and correctly drained. A concealed hinge may be the better choice when an uninterrupted outer surface is essential and the internal cavity remains accessible for inspection. Neither architecture wins by name alone.
When the Service Panel Must Come Off
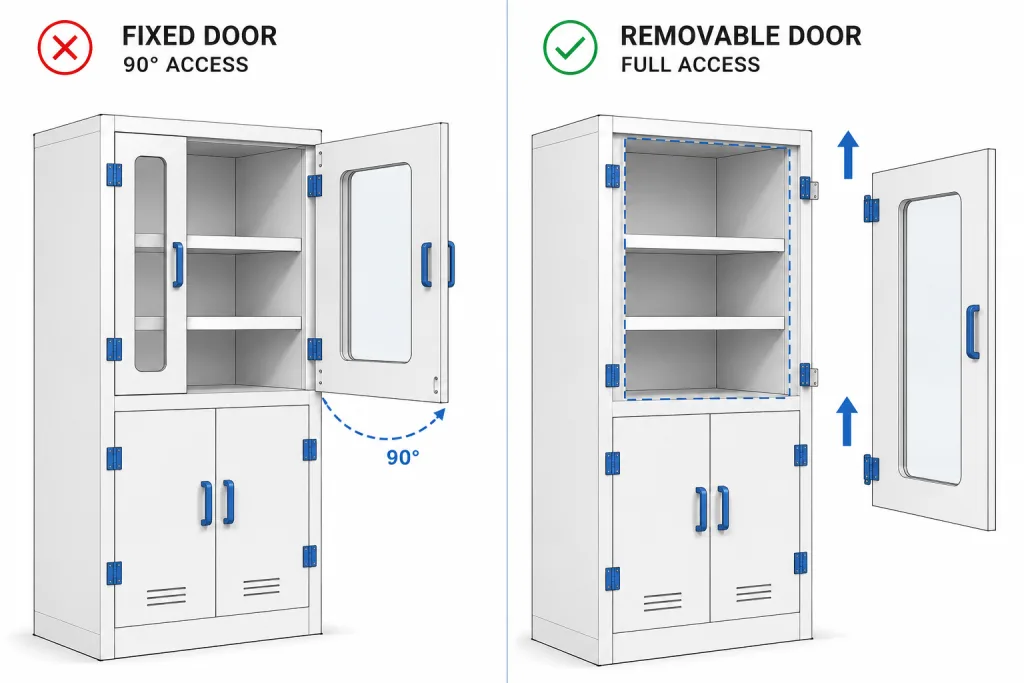
Removal should solve a real access problem. It may expose a chamber wall, filter, wiring tray, pump, sensor module, or internal enclosure surface that cannot be reached through the normal door opening.
A lift-off or removable-pin hinge can provide that access, but it also changes the risk profile. The panel becomes a handled component. Its mass, grip points, cables, gasket, glazing, sharp returns, and storage location now matter.
- Captive or removable: decide whether the panel must remain attached during routine work or can be fully removed.
- Tool-free or controlled tool use: tool-free removal is not automatically safer; it may be unacceptable where accidental lift-off or loose parts are a concern.
- One-person handling: confirm whether the panel can be supported, lifted, and reinstalled without twisting the hinge line or damaging the gasket.
- Pin control: define whether the pin stays captive, remains in one leaf, or becomes a separate service item.
- Storage after removal: provide a clean, stable location instead of placing the panel against adjacent equipment or on the floor.
Before choosing a model, use the lift-off hinges for removable access panels guide to decide whether complete panel removal is justified. After that architecture is confirmed, the 48 mm removable concealed hinge can serve as one compact model reference, not as a universal laboratory-cabinet selection.
The Removal Path Is Part of the Design
A hinge may be removable on a bench and impossible to remove in the finished cabinet. A shelf, worktop, adjacent analyzer, wall, cable bundle, or upper enclosure return can block the required lift or axial motion. For handing, pin direction, axial clearance, and anti-lift details, use the lift-off hinge clearance and pin-direction guide.
The drawing should show the complete movement from closed position to full disengagement. Do not dimension only the hinge pin. Include the whole panel envelope, grip space, cable or tubing path, and the position where the weight transfers from the hinge to the operator.
| Removal Input | What to Show | Failure if Missing |
|---|---|---|
| Disengagement direction | Vertical lift, axial slide, or pin withdrawal | The hinge architecture is misunderstood |
| Minimum clearance | Panel envelope plus hand or tool access | The panel hits a worktop, wall, or neighboring instrument |
| Cable and tubing release | Connector location, service loop, and disconnection sequence | The panel loads wires or fluid lines during removal |
| Panel support | Mass, grip points, temporary support, or second-person need | The panel drops, twists, or damages the enclosure edge |
| Reinstallation approach | Lead-in feature, pin alignment, and datum | The leaves are forced together and the door returns out of position |
Reinstallation Must Restore the Closed Condition
A removable panel is not successfully designed merely because it comes off. It must return to the same controlled closed condition.
The hinge, cabinet frame, gasket, latch, and panel stiffness work together. Small changes in pin engagement, leaf seating, fastener position, or panel sag can alter gasket compression and move the latch away from the striker.
The panel fit after service, but the latch did not
The removed panel could be placed back on the hinges without resistance. The technician considered the work complete. When the latch was closed, however, the striker sat slightly low and the hinge-side gasket was compressed more heavily than before.
The joint needed a better lead-in and a controlled seating datum, not simply a larger latch adjustment range. Reinstallation had to be checked at the hinge, gasket, and latch together.
This is an illustrative engineering scenario, not a customer project record or product test claim.
- Use a controlled datum or seating feature that tells the operator when the leaves are fully engaged.
- Check the panel gap at the hinge side and latch side after repeated removal and reinstallation.
- Verify gasket compression over the complete perimeter, not only at the latch.
- Confirm that the latch closes without using it to pull a misaligned panel into position.
- Record any adjustment that is permitted after reinstallation and who is allowed to make it.
Materials Need a Component-by-Component Return
The supplier should not answer a laboratory-cabinet inquiry with only one line such as “stainless steel hinge.” The buyer needs to know which components are stainless, which are plated or polymeric, and which internal parts may contact the cleaning process.
| Component | Supplier Return | Project Check |
|---|---|---|
| Leaves or body | Material grade and finish | Visible-surface, corrosion, and cleaning requirement |
| Pin or shaft | Material, finish, and retention method | Exposure path, wear, and removability |
| Fasteners or studs | Material and coating | Head accessibility and galvanic combination |
| Bushings or friction parts | Material and location | Chemical exposure, wear debris, and serviceability |
| Welded interface | Compatible material and recommended process, when supplied | Actual weld profile, distortion, finishing, and inspection |
| Lubricant or thread compound | Type or supplier restriction, when applicable | Contact with cleaner, residue sensitivity, and maintenance method |
Chemical compatibility remains project-specific. The cleaner name alone may not be enough; concentration, temperature, contact time, repeated exposure, rinse, and drying can change the result. Do not publish “chemical proof,” “cleanroom certified,” or “autoclave suitable” without exact evidence for the complete model and assembly.
Where a welded exterior joint is being considered, confirm the exact body, pin, fastener, weld, and finish materials on the controlled drawing. The equipment geometry, weld quality, cleaning path, and validation still control the final decision; the words “stainless steel” do not close that review.
What the Cabinet Drawing Must Show
The hinge supplier cannot evaluate cleaning access or removability from a leaf outline alone. The drawing should show enough of the cabinet to reveal the joint. Use the hinge spec sheet and engineering drawing guide for revision control, tolerances, hole patterns, and document evidence that apply across hinge families.
- Door or service-panel mass and overall envelope.
- Hinge quantity, orientation, and pin centerline.
- Cabinet return, frame flange, nearby shelf, wall, or neighboring equipment.
- Gasket cross-section, compression direction, and latch location.
- Full opening angle and the hinge-side wipe path.
- Removal direction and the minimum extraction clearance.
- Cable, tube, or interlock path through the opening range.
- Fastener, weld, pin, or tool access required during service.
- The controlled datum used to restore alignment after reinstallation.
Drawing boundary: a hinge outline that fits inside the available space is not enough. The release drawing must also prove cleaning access, removal clearance, and the closed alignment condition.
What the Sample Must Prove
A loose hinge sample confirms appearance and basic motion. It cannot prove the installed cabinet detail.
Use a production-intent or representative door assembly whenever the hinge affects the gasket, latch, removal path, or cleaning access. Record the exact hinge model and drawing revision so the sample result can be transferred to production.
| Sample Check | Acceptance Evidence |
|---|---|
| Opening and wipe access | The hinge-side return, fasteners, and lowest joint point are accessible under the defined cleaning method |
| Panel removal | The full panel clears the cabinet and surrounding equipment without loading cables or tubing |
| Panel handling | The panel can be supported and stored using the defined service method |
| Reinstallation | Leaves or pins engage without force, and the controlled datum is reached |
| Gasket and latch recovery | Gap, compression, and striker alignment return to the approved condition |
| Fastener or weld condition | No loosening, cracking, distortion, sharp edge, or inaccessible residue path appears |
| Representative exposure | Material and joint condition remain within project-defined acceptance criteria |
The article cannot define universal acceptance limits for chemical exposure, gap size, gasket compression, or cycle count. Those values must come from the cabinet requirement, supplier evidence, and the responsible engineering review.
Supplier Evidence Before Release
Before a laboratory cabinet hinge is released, the supplier return should connect the exact model to the cleaning boundary, access geometry, and installed sample.
Model Identity
- Part number and drawing revision
- Opening or lift-off direction
- Mounting pattern and pin centerline
- Any model-specific installation limits
Material Evidence
- Leaf/body material and finish
- Pin, fastener, bushing, and internal-part materials
- Weld or mounting recommendations, when applicable
- Known cleaning or chemical restrictions
Access Evidence
- Installed opening and removal drawing
- Tool and hand-clearance requirements
- Pin or retention method
- Reinstallation and seating method
Sample Evidence
- Sample identity and revision
- Inspection or functional record
- Approved deviations, if any
- Change-control requirements
Send the Cabinet Door or Service-Panel Drawing
Share the cabinet section, door or panel mass, hinge-axis location, gasket and latch detail, cleaning boundary, removal direction, available clearance, and the materials the cleaning process can reach. HSP can compare fixed, concealed, lift-off, and removable hinge architectures against that access point.
Laboratory Cabinet Hinge Questions
What hinge type is best for a laboratory cabinet door?
A fixed butt, concealed, or surface-mounted hinge may suit a captive door. A lift-off or removable-pin hinge may suit a service panel that must come off. The choice depends on cleaning access, removal clearance, gasket and latch recovery, panel mass, and the installed joint—not the room name alone.
Are stainless steel laboratory cabinet hinges automatically cleanable?
No. Cleanability also depends on leaf overlap, knuckle gaps, screw heads, weld profile, drainage, internal pockets, and access to the hinge-side cabinet return. Review the complete installed joint and every exposed component.
When should a laboratory cabinet use a lift-off hinge?
Use a lift-off architecture when removing the panel creates meaningful cleaning or service access. Confirm disengagement direction, overhead and side clearance, panel handling, cable or tubing release, captive-part requirements, and repeatable reinstallation.
Can a concealed hinge be easier to clean?
It can leave the outer surface uninterrupted, but the hidden internal pocket may be harder to inspect or dry. Compare the outer wipe path with internal access, retained-liquid points, fasteners, and the removal method.
What should be checked after reinstalling a removable service panel?
Check that the hinge leaves or pins are fully seated, the panel gaps return to the approved condition, the gasket compresses consistently, the latch aligns without pulling the panel into place, and cables or tubing are not trapped.
What evidence should a laboratory cabinet hinge supplier provide?
Request the exact model and drawing revision, component-level materials and finishes, opening or removal direction, installation and access limits, representative sample identity, functional or inspection records, known restrictions, and change-control requirements.
Technical limitation: This article provides a cabinet-hinge selection and review framework. It does not certify a hinge or completed cabinet for laboratory, cleanroom, chemical, medical, electrical-safety, or contamination-control requirements. Material compatibility, cleaning method, drainage, removal safety, gasket recovery, and sample acceptance remain model- and project-specific.